Key Points
- Microsoft announced Windows Subsystem for Android for Windows 11 but has no plan of bringing it to Windows 10. With aftermarket Windows developers, you can now get WSA on Windows 10 as well.
- To port WSA to Windows 10, enable virtualization from UEFI settings, enable “Windows Hypervisor Platform” and “Virtual machine platform” optional features, enable Developer Mode, install WSL from Microsoft Store, and then download, extract, and run the WSA installer batch file from GitHub.
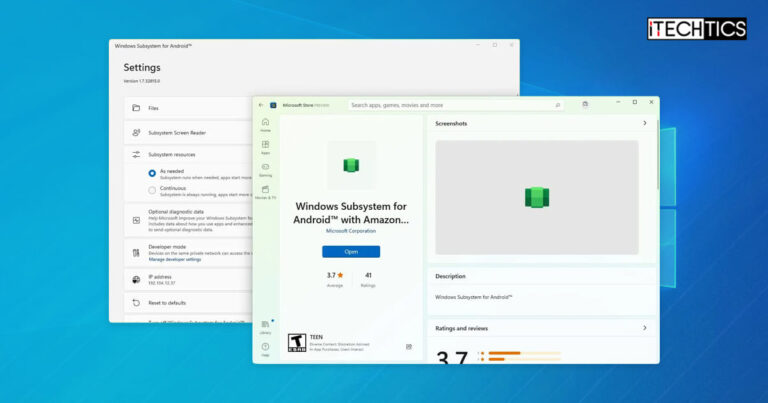
The Windows operating system allows virtualizations – an ability to run other operating systems on top of Windows. Windows Subsystem for Linux (WSL) and Windows Subsystem for Android (WSA) are two distinct parts of this virtualization, where the former allows you to install Linux distributions, and the latter lets you run Android applications. Unfortunately, Microsoft only ever announced WSA for Windows 11.
Due to the harsh system requirements for Windows 11, many consumers still use older Windows operating systems, especially Windows 10. However, there is no official way of installing Android apps directly on the operating system. Instead, you must use Android emulators to do that.
That said, WSA uses virtualization technology, especially the Hyper-V hypervisor to run the Android apps on Windows 11. Thankfully, the same support and features are also available on Windows 10. The aftermarket Windows developers were thus able to manipulate the WSA technology for Windows 11 and port it to Windows 10 as well.
This guide provides a step-by-step guide on how to install Windows Subsystem for Android on your Windows 10 PC.
Table of Contents
Installing Windows Subsystem for Android on Windows 10
The method I am about to show you to install WSA uses a backport of Windows Subsystem for Android to Windows 10, which is in the form of a script written by a user on GitHub. This script, or the batch file manipulates Windows Subsystem for Linux, which is a similar technology to WSA, and backports Windows 11 WSA to Windows 10.
Before actually downloading and running the script, there are a ton of prerequisites that your system must satisfy, such as the hardware requirements, certain features that should be enabled, etc. Let us get right to it.
Prerequisites
System requirements
Since WSA has not yet been officially announced for Windows 10, there is no official statement on the system requirements either. However, following in Windows 11 footsteps, here are the basic requirements that we think are necessary:
- RAM: 8GB (minimum) / 16GB (recommended)
- Processor: x64 or ARM64, 1GHz or faster
- Operating system: Windows 10 22H2
Before proceeding with the rest of the prerequisites, make sure that your system meets these requirements. You can check your Windows version by running the command “winver” in the Run Command box.
Enable virtualization for BIOS/UEFI settings
As mentioned earlier, WSA uses virtualization technology to run other operating systems on top of Windows. For that, you must enable virtualization from the system BIOS. Here is how:
In the BIOS settings, look for the “virtualization” or “VTx” tab. From here, enable system virtualization.
The Setting may be called either one of the following, depending on your computer/CPU manufacturer:
- VT-x
- AMD-V
- SVM
- Intel VT-d

Enable virtualization from BIOS Now restart your computer and boot into the operating system normally.
After performing the steps above, virtualization has been enabled from the BIOS, but you still need to enable it from within the operating system.
Enable Windows Hypervisor Platform, Virtual machine platform
After booting into Windows, you must next enable some optional features that will allow installing WSA on Windows. The following features need to be enabled:
- Windows Hypervisor Platform
- Virtual Machine Platform
Use the following steps to enable these:
Press the Windows key + R to open the Run Command box.
Type in “optionalfeatures” and press Enter to launch the Optional Features window.
Check the boxes next to the following options and click OK.
- Windows Hypervisor Platform
- Virtual Machine Platform

Enable virtualization optional features in Windows 10 Restart the computer.

Restart the computer
Enable Developer Mode
Developer Mode is a feature in Windows that allows you to perform additional testing and debugging of the Windows Store as well as third-party applications. Furthermore, it also introduces some new tools to the Windows environment designed to help the developers with their testing. When enabled, it offers the following additional tools for the developers to use:
- Installing and debugging uncertified Windows Store applications.
- Device Portal
- Device Discovery
Not only that, this mode improves the following Windows tools for an optimized developer experience:
Here are the steps to enable the Developer mode on Windows 10:
Press the Windows Key + i to open the Settings app.
Click “Update & Security” at the bottom.
Click “For developers” on the left.
Here, toggle the slider under “Developer Mode” into the On position.

Turn on Developer Mode When asked for a confirmation, click Yes.

Yes to confirm
Now that developer mode is enabled, you should have no trouble running the batch file to backport WSA to Windows 10.
Install Windows Subsystem for Linux
Now, you need to install WSL on your Windows 10 computer. This is the last step before you can run the script to backport WSA to Windows 10. Here is how:
Open the WSL page on the Microsoft Store.
Click Install.

Install WSL The Microsoft Store app will now launch.
Click Get.

Get WSL WSL will now download and install on your PC.
Once these prerequisite steps have been performed, you can continue to run the specialized batch script and port Windows 11’s WSA to Windows 10.
Install Windows Subsystem for Android
Use the following steps to download and run the batch file to install WSA on a Windows 10 PC:
Click “WSA-Setup.rar” to download the file.

Download WSA Setup file Extract the downloaded package.
Note: You will need an RAR extractor since Windows 10 does not natively support this compression format.

Extract the RAR file Open the extracted folder and run the file labeled “setup.bat.”
Once installed, press any key to continue.
Note: Experiencing errors during the installation is normal and WSA will still be installed.

WSA installed successfully on Windows 10
After performing the steps above, Windows Subsystem for Android will now be installed successfully, and you should be able to run any Android app.

Takeaway
When Microsoft first introduced Windows Subsystem for Android, it turned heads for the developers as it was not anticipated. It meant that users no longer needed to run heavy emulators to run Android applications, where the apps didn’t run at their full potential anyways, and needed a lot of system resources.
However, Microsoft never announced WSA for Windows 10, nor are there any rumors of announcing it anytime soon. Perhaps, WSA was never planned to be released for Windows 10 since it is bound to reach end of life in 2025. But thanks to aftermarket developers and tweakers, we got WSA for Windows 10, and surprisingly, many versions of it.
The method discussed in this post to install Windows Subsystem for Android on a Windows 10 PC is perhaps one of the most convenient methods out there. There are other methods and tools as well, but all get the same result.


1 comment
Paul Durand
Installed great, I have not test drove it yet.
Thanks for thinking outside the box.
Have a Merry Christmas
Duran the Handyman
Dallas, TX