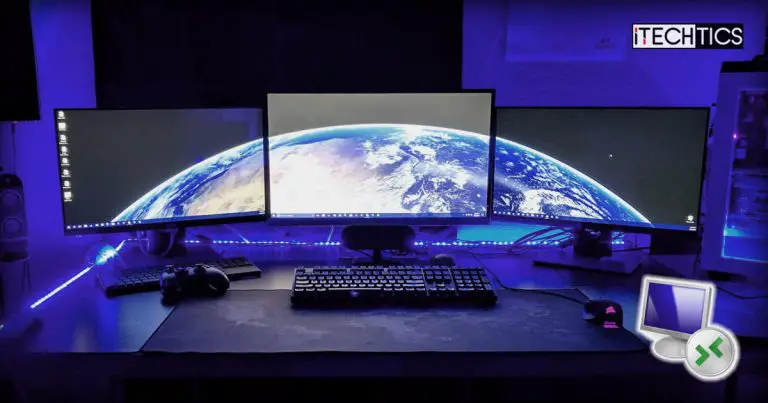
If you have multiple monitors on your host computer, you can use all of them to connect to a remote computer using the Windows Remote Desktop Connection app. This is a multi-monitor feature that Windows supports.
Today we will show you 3 methods to use all your monitors with Remote Desktop. However, with the standard pre-installed Remote Desktop app that comes with Windows, you cannot expand an existing RDP connection to more monitors (nor shrink it). Instead, the connection will need to be terminated, and then establish a new connection with multiple display devices.
Furthermore, the methods discussed below are valid for up to 16 connected monitors. Meaning that all 16 monitors connected monitors can be used in a Remote Connection to enhance your productivity, regardless of how many actual monitors are connected to the remote PC.
Let us now proceed to see how to achieve this task.
Table of Contents
How to Use Dual Monitors with Remote Desktop
From the Remote Desktop Connection App
One way to use all your monitors in a Remote Desktop Connection is through the RDC app itself. Here is how:
-
Open the Remote Desktop Connection app by searching for it in the Start menu, or by typing in mstsc in the Run Command box.

Open RDC app -
From the RDC window, click Show Options.

Expand more options -
Now switch to the Display tab and then check the box next to “Use all my monitors for the remote session.”

Use all monitors -
Now proceed with the rest of the connection settings and provide the details for the machine to connect with.
When the connection is established, you will notice that all your connected displays are now being used for the Remote Desktop Connection.
From the Command Box
Another method is to open the Remote Desktop Connection app while reconfiguring the multi-monitor property. This can be done using special cmdlets in the Run Command box or any other command line. Here is how:
-
Open the Run Command box using the Windows Key + R shortcut keys, or alternatively, open the Command Prompt.
-
Here, paste the following cmdlets and hit Enter.
mstsc.exe -multimon
Open RDC app with multiple monitors enabled This cmdlet will automatically check the “Use all my monitors for the remote session” option.
-
The RDC app will now open as usual. Provide the details of the remote PC to connect with and click Connect.

Enter remote PC’s details
Once the connection is established, all your monitors will now be used for the session.
From RDP File
Windows can create an RDP file for a specific connection, which acts as a shortcut to connect to a remote PC. The RDP file saves all the configuration, and all you need to do is double-click it to connect to the PC.
By editing this file, you can configure it to always connect using the multi-monitor mode. The following steps illustrate how to create this file and edit it to achieve the task:
-
Open the Remote Desktop Connection app by searching for it in the Start menu, or by typing in mstsc in the Run Command box.
-
From the RDC window, click Show Options.

Expand more options -
Enter the details for the PC to connect to, then click Save as to save the RDP file.

Save RDP file -
Now select a location and a name for the file, then click Save.
-
Once saved, navigate to the RDP file using File Explorer, right-click it, expand Open with from the context menu, then select Notepad.
Note: If you do not see Notepad, click Choose another app and then select Notepad from the list.

Choose an app -
In the Notepad file, add the following line:
Use Multimon:i:1

Edit RDP file You can also exclude some monitors from the session by using the following text inside the RDP file:
selectedmonitors:s:x1,x2,x16
The “x1” represents the primary monitor and the “x16” represents the 16th monitor. You can adjust this line according to the monitors that you want to hide.
-
Now, save the file using the CTRL + S shortcut keys.
Once the changes are made, simply execute the RDP file and your connection will be established using the selected monitors.
At this point, we would also like to bring to your attention the Span mode and what it is.
What is Span Mode
Span mode is somewhat similar to Windows multi-monitor mode. It was first introduced with Windows Vista, but did not catch on. This is because this mode displays the remote PC’s single screen across multiple displays on your host PC.
To further elaborate, the multi-monitor feature makes it seem like every remote monitor displays on a separate host monitor. But Span mode makes it seem like a single remote monitor is expanded across all local monitors. The images below will give you a better understanding of the 2 modes:


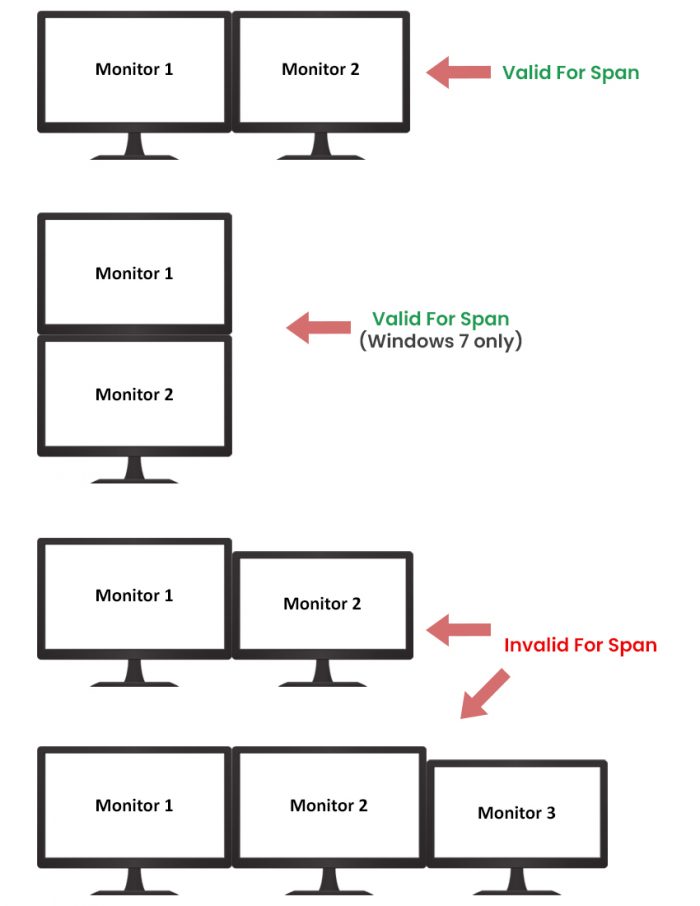
One of the reasons the Span mode didn’t become popular was because of its restrictions. Span mode cannot be used if the monitors are of different sizes and resolutions, hence the display cannot fit the rectangles. The image below better illustrates which connections can be established and which can’t.

If you’d still like to try out the Span mode, here is how:
-
Open the Run Command box using the Windows Key + R shortcut keys, or alternatively open the Command Prompt.
-
Here, paste the following cmdlets and hit Enter.
mstsc /span

Open RDC in Span mode -
The RDC app will now open as usual. Provide the details of the remote PC to connect with and click Connect.
A remote connection will now be established, and you will notice that one giant screen can be seen across all your local monitors.
Final Takeaway
With the methods discussed in this post to connect to remote PCs using all your display devices, you now no longer need to download and use third-party applications on a Windows computer.
In our opinion, the most convenient method to do so is through the Remote Desktop Connection app or by using the “multimon” cmdlet to launch the app directly with multiple monitors enabled. Which method would you prefer and why? Tell us in the comments section down below.


