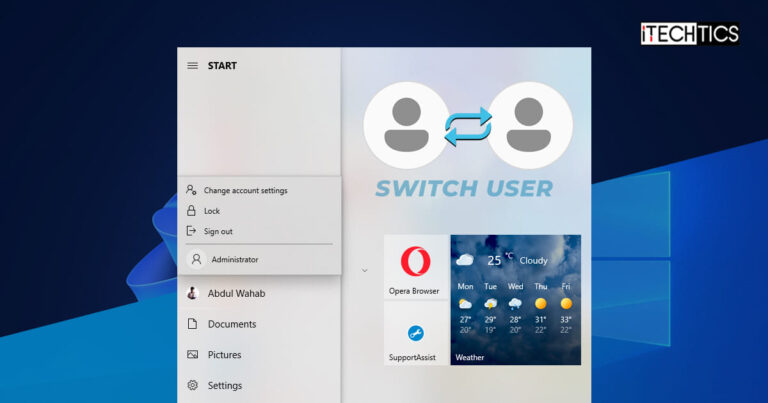
If your Windows computer has more than one user account, then you will probably see the “Switch User” option in the Start menu. This option lets you quickly change your user account when needed. In a situation where you have one account set up for work and another for home, this option is a seemingly convenient way to switch between them instantly.
That said, there have been reports that the “Switch User” option has been missing for some Windows users, even when they have multiple accounts on their system. Some have even reported that the option is only visible when all accounts are explicitly logged out.
That shouldn’t be the case. In this article, we show you how to fix this error on a Windows computer without having to repair or reinstall your operating system.
Table of Contents
Why the Switch User Option is Missing?
There can be several reasons for the “Switch User” option to be missing in the start menu. Here are the most common reasons:
- You only have one account enabled on your computer.
- Your domain administrator has disabled the option.
- The “Switch User” option is disabled from the Group Policy or the Windows Registry.
- A Windows update has disabled the option.
Whatever the reason, you can always fix it and get the “Switch User” option back and instantly switch to another user account.
Restore Missing “Switch User” Option
Create Another User Account
This is not a proper solution, but a workaround to get the “Switch User” option in the Start menu or the Alt + F4 shutdown menu. You may not see the “Switch User” option in either of these menus if there is no user account to switch to.
There are multiple ways to create a new user account on a Windows PC. You can create an administrative account, enable the built-in Administrator account, or create a standard account. You can create an account from the Settings app, the Local Users and Groups console, and the Computer Management console.
Here, we show you how to create a local, standard account from the Settings app:
Go to the following:
Settings app >> Accounts >> Other users
Click “Add account.”

Create a new user account from the Settings app From the popup, click “I don’t have this person’s sign-in information.”

Don’t have the sign-in information Now click “Add a user without a Microsoft account.”

Create a local account from Settings app Next, enter a name for the user account, set a password, set up recovery questions and answers, and click Next.

Enter the details for the account
The new account will now be created. Now, you should be able to see the name of the new account in the Start menu or the “Switch user” option in the Alt + F4 shutdown menu.

As we mentioned earlier; this is not a solution, but a simple workaround. If you already have multiple accounts set up and still can’t see the “Switch user” option, then implement the following fixes given below.
Enable Fast User Switching from Group Policy
The “Switch User” option may be disabled from the Group Policy. If your computer is part of an organization/domain, then this solution won’t help you. Instead, proceed to make the changes at a registry level, shared in the next section of this post.
However, if your system administrator has disabled it explicitly for your computer while it is not part of a domain, then you can try and re-enable the “Switch user” option from Group Policy. Here is how:
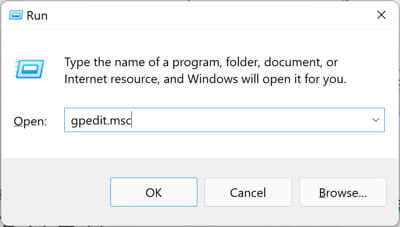
Open the Group Policy Editor by typing in “gpedit.msc” in the Run Command box.

Open the Group Policy Editor Now navigate to the following path from the left pane:
Computer Configuration >> Administrative Templates >> System >> Logon
Double-click the Group Policy “Hide entry points for Fast User Switching” on the right.

Open policy for Fast User Switching Select “Disabled” and then click Apply and Ok.

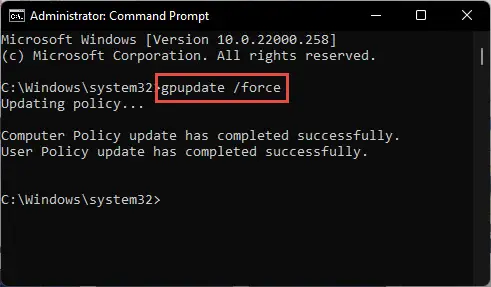
Enable entry points to switch users using Group Policy Now run the following cmdlet in an elevated Command Prompt to enforce the new policies:
GPUpdate /Force
Enforce Group Policy
This should bring back the “Switch User” option. If this doesn’t work, you can use the steps in the next section to enable the option directly from Windows Registry.
Enable “Switch User” Option from Windows Registry
If none of the solutions above have worked for you, you can try out this method to restore the “Switch user” option from the Windows Registry.
You can download and run the batch file to instantly make the necessary changes to the Windows Registry, or perform the steps below manually.
 Enable Fast User Switching (unknown, 311 hits)
To use the .bat file, download it and extract the contents. Then, run the .bat file as an administrator.
Alternatively, you can perform the steps yourself using these steps:
Note: Misconfiguration of critical values in the system’s registry could be fatal for your operating system. Therefore, we insist that you create a system restore point or a complete system image backup before proceeding forward with the process.
You can also use our top selection of disk imaging and backup software so you never lose your data or operating system again.
Open the Registry Editor by typing in “regedit” in the Run Command box.

Open the Registry Editor Paste the following in the navigation bar and hit Enter for quick navigation:
Computer\HKEY_CURRENT_USER\Software\Microsoft\Windows\CurrentVersion\Policies

Navigate to the Policies Key Right-click the Policies key, expand New, and then click Key from the context menu. Name this key “System“.

Create the System key under Policies Right-click the System key, expand New, and then click DWORD (32-bit) Value from the context menu. Name this DWORD “HideFastUserSwitching“.

Create the HideFastUserSwitching DWORD Double-click the DWORD “HideFastUserSwitching” and set its Value Data to “0“.

Enable Fast User Switching from Windows Registry Now restart the computer for the changes to take effect.
Once the computer restarts, and you have more than one user account on the computer, then the “Switch User” option should be visible in the Start menu as well as the Alt + F4 shutdown menu.
Conclusion
The “Switch User” option isn’t mandatory for you to be able to sign into a different user account. However, it is a convenient option to have. This way, you do not have to sign out of your current account and close all the apps, and instantly sign into another account.
If you have multiple users created and activated on your Windows PC, enable the “Switch User” option today and easily change your working profiles.


