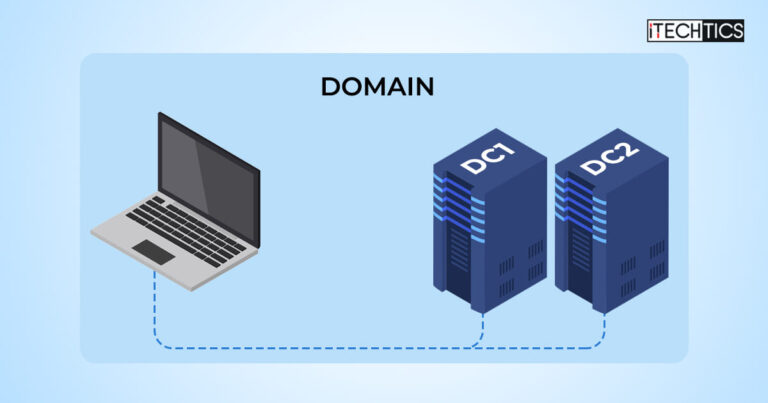
This article can prove helpful for the sysadmins working in an environment with multiple Domain Controllers (DC), especially if you are trying to troubleshoot and determine whether there is a bad controller. This can be done by switching the Domain Controller from one DC to another on a Windows client PC.
Changing your Domain Controller (while remaining inside the same domain) and then finding that it resolved the issue means that there was a problem with the initial controller. You may also want to change a Domain Controller for a client PC due to other reasons, like the user switching their location, their workgroup, etc.
In this post, we show you multiple ways to find your current Domain Controller’s name and how you can change it to a different controller on a Windows 11 PC. Do not confuse this with changing domains; instead, we will only be discussing changing DCs inside the same domain.
Table of Contents
Find Current Domain Controller
You can get the name of your currently-joined domain from the computer’s “About” Settings page, or even from the Network Connections applet (ncpa.cpl) under the NIC.
![How To Switch Domain Controller On Windows 11 [Temporary + Permanent] 1 View domain name from Settings](https://itechtics.com/wp-content/uploads/2023/04/View-domain-name-from-Settings-700x394.jpg)
When you know the name of the domain, note it down. You can then use the following cmdlet in the Command Prompt to find out which Domain Controller your PC is currently connected to:
Note: Replace [DomainName] with the name of your domain.
nltest /dsgetdc:[DomainName]![How To Switch Domain Controller On Windows 11 [Temporary + Permanent] 2 Get current domain controller name from Command Prompt](https://itechtics.com/wp-content/uploads/2023/04/Get-current-domain-controller-name-from-Command-Prompt-700x394.jpg)
Here, you will find the name of the Domain Controller in front of “DC:“.
Now, you can continue to switch your domain controller to another server. Before you do, make sure that you have the required server’s name as well as the appropriate domain credentials.
Switch Domain Controller using Command Prompt [Temporary]
One of the methods to change your connected Domain Controller is from the Command Prompt. Use the following steps to change it:
Note: Using this method to change the Domain Controller is only temporary. The PC might catch another Domain Controller when it is restarted. To change the Domain Controller permanently, use the Windows Registry method shared in the next section.
-
Type in “CMD” in the Start menu, right-click “Command Prompt,” and then click “Open file location.”
![How To Switch Domain Controller On Windows 11 [Temporary + Permanent] 3 Open CMD file location](https://itechtics.com/wp-content/uploads/2023/04/Opem-CMD-file-location-700x394.jpg)
Open CMD file location -
Hold down the Shift key and then right-click the “Command Prompt” file. From the context menu, click “Run as different user.”
![How To Switch Domain Controller On Windows 11 [Temporary + Permanent] 4 Run CMD as a different user](https://itechtics.com/wp-content/uploads/2023/04/Run-CMD-as-a-different-user-700x394.jpg)
Run CMD as a different user -
Now, enter the credentials for the domain administrator account (in the format shown in the image below) and click Ok.
![How To Switch Domain Controller On Windows 11 [Temporary + Permanent] 5 Enter credentials for domain administrator account](https://itechtics.com/wp-content/uploads/2023/04/Enter-credentials-for-domain-administrator-account-700x394.jpg)
Enter credentials for domain administrator account The Command Prompt will now run with domain administrative privileges.
-
Now use the following command while replacing the necessary variables according to your environment to change the Domain Controller:
Replace [ComputerName] with the name of the Windows 11 client PC, [DomainName] with the name of the domain, and [DomainControllerName] with the name of the Domain Controller to which to want to change the controller.
nltest /Server:[ComputerName] /SC_RESET:[DomainName]\[DomainControllerName]![How To Switch Domain Controller On Windows 11 [Temporary + Permanent] 6 Change Domain Controller from Command Prompt](https://itechtics.com/wp-content/uploads/2023/04/Change-Domain-Controller-frmo-Command-Prompt-700x394.jpg)
Change Domain Controller from Command Prompt
That’s it! The Domain Controller should now be changed. You can confirm this by running the command discussed above to find out the name of your Domain Controller.
![How To Switch Domain Controller On Windows 11 [Temporary + Permanent] 7 Confirm that Domain Controller has been changed](https://itechtics.com/wp-content/uploads/2023/04/Confirm-that-Domain-Controller-has-been-changed-700x394.jpg)
Change Domain Controller from Windows Registry [Permanent]
To change the Domain Controller permanently, use the steps given below. This way, you can make changes directly to the Windows Registry and switch to a different Domain Controller.
Note: Misconfiguration of critical values in the system’s registry could be fatal for your operating system. Therefore, we insist that you create a system restore point before proceeding forward with the process.
You can also use our top selection of disk imaging and backup software so you never lose your data or operating system again.
-
Open the Registry Editor by typing in “regedit” in the Run Command box.
![How To Switch Domain Controller On Windows 11 [Temporary + Permanent] 8 Open the Registry Editor](https://itechtics.com/wp-content/uploads/2022/02/regedit.jpg)
Open the Registry Editor -
Paste the following in the address bar for quick navigation and hit Enter:
Computer\HKEY_LOCAL_MACHINE\SYSTEM\CurrentControlSet\Services\Netlogon\Parameters
![How To Switch Domain Controller On Windows 11 [Temporary + Permanent] 9 Navigate to the Parameters key](https://itechtics.com/wp-content/uploads/2023/04/Navigate-to-the-Parameters-key-700x394.jpg)
Navigate to the Parameters key -
Create a new String Value under Parameters by the name “SiteName.”
![How To Switch Domain Controller On Windows 11 [Temporary + Permanent] 10 Create the String Value SiteName](https://itechtics.com/wp-content/uploads/2023/04/Create-the-String-Value-SiteName-700x394.jpg)
Create the String Value “SiteName” Right-click the Parameters key in the left pane, expand New, and then click String Value. Name this value “SiteName“.
-
Double-click the string “SiteName” and set its Value Data to the Fully Qualified Domain Name (FQDN) of the Domain Controller that you want to switch to. This will be something like the following:
DC2.DomainName.com
![How To Switch Domain Controller On Windows 11 [Temporary + Permanent] 11 Set Domain Controller name as the value for SiteName in Windows Registry](https://itechtics.com/wp-content/uploads/2023/04/Set-Domain-Controller-name-as-the-value-for-SiteName-in-Windows-Registry-700x394.jpg)
Set Domain Controller name as the value for SiteName in Windows Registry -
Now close the Registry Editor and restart the computer for the changes to take effect.
When the computer restarts, the Windows PC will automatically connect to the selected Domain Controller every time.
Closing Thoughts
As we have experienced during the testing of these methods, a Domain Controller can get corrupted if incorrectly configured. At such a time, it is wisest to change the Domain Controller while the sysadmins work it out. You do not need to bear the losses caused by a faulty Domain Controller.
In this article, we show you both temporary and permanent methods to change your Domain Controller while staying within the same domain.


