Microsoft Quick Assist is a preinstalled application in Windows 10 version 1607 and later, as well as Windows 11. This is a Windows-native application that can be used as an alternative for TeamViewer, AnyDesk, etc., that lets you view or take control of a remote PC over the internet.
Previously, this app only came preinstalled on the Windows OS. However, this app was moved to Microsoft Store a while back for greater performance and security optimization.
In this article, we show you how to use the app to establish a remote desktop connection using Quick Assist, how to install and uninstall it if needed, and everything else there is to know about the app.
Table of Contents
What is Microsoft Quick Assist
Quick Assist is an application from Microsoft which is an improvement on top of the legacy Remote Desktop Connection applet. This app uses your Microsoft account (Microsoft 365 or standalone Microsoft account), an active internet connection, and an authentication process so that a remote desktop connection can be established.
This application is designed with the intention of users needing remote assistance with their Windows computer from technical support when needed. Using Quick Assist, one no longer needs to download and install a third-party application like TeamViewer or AnyDesk.
Quick Assist uses the 443 port, the same as HTTPS, to establish the remote connection, and is encrypted with TLS 1.2.
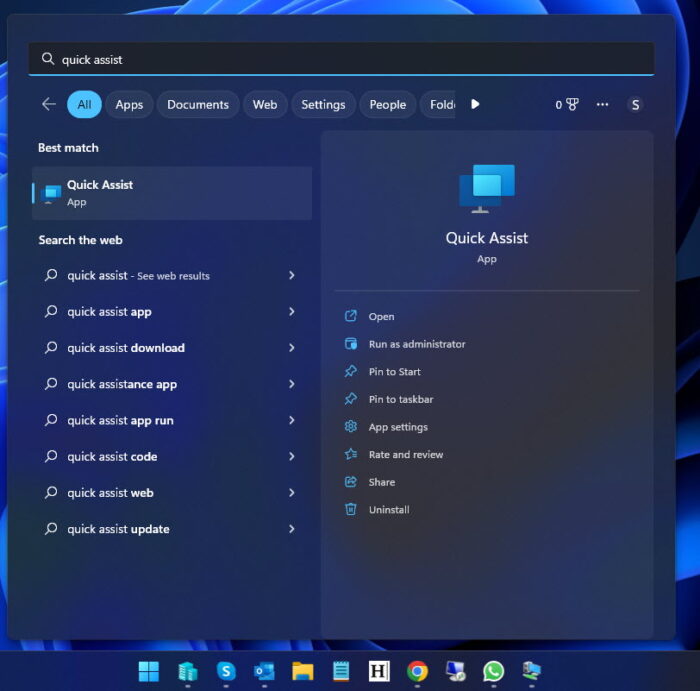
If Microsoft Quick Assist is installed on your computer, then you can open it by searching for it from the Start menu, or by pressing the CTRL + Windows Key + Q shortcut keys.

Now before we show you how to use the app, there are a few things you must know.
Before You Begin
Here are a few things that you ought to know before establishing a remote connection using Quick Assist:
- Unline Remote Desktop Connection, a connection can be established using Quick Assist online, and the remote PC does not necessarily need to be on the same network as yours.
- Both of the computers need to be running at least Windows 10 version 1607 or later. To check which Windows version you are running, type in “winver” in the Run Command box.
- It is not necessary for both PCs to have the same OS build, as long as it meets the minimum version requirements.
- Since there is an authentication process involved, the person who requires the assistance needs to be available on the remote PC to allow a connection to be established.
- If you are the one providing the assistance, then you need a Microsoft account to log into the app.
- You cannot hear any sounds from the remote computer during a Quick Assist session. However, you can communicate with the person available at the remote end using other methods discussed below.
- Unlike most third-party apps, the person providing the assistance must generate a code for authentication and share it with the person who needs assistance.
- The generated code is only valid for 10 minutes and must be used within that time frame to establish a connection.
Let us now show you how to use the Quick Assist app to establish a remote desktop connection.
How to Establish a Remote Connection using Quick Assist
The method below showcases the steps that need o be applied on both of the computers involved in a Quick Assist connection.
For reference, we will assume that “Machine A” is the computer from where the assistance is being provided, and “Machine B” is the computer where assistance is needed.
Machine A: Launch the Quick Assist app either using the Start menu or using the CTRL + Windows Key + Q shortcut keys.
Machine A: Click “Assist another person.”

Assist another person Machine A: Sign into the app using your Microsoft credentials.
If you don’t have one already, you can sign up for free.
Machine A: Once signed in, share the security code with the person available at Machine B.

Security code generated Machine B: Enter the shared security code (while it is still valid) and click “Share screen.”

Enter code and share screen Machine A: Choose whether to only view the screen or take full control, then click Continue.

Take control or view the screen Machine B: Allow the person on Machine A to view your screen by clicking Allow.

Allow assistance
That’s it! The person on Machine A will now be able to view your screen/take control of your PC while the person on Machine B will be able to see what is happening.

At this point, the user on Machine B can leave their seat and allow Machine A to make any unsupervised changes to your computer.
You may now perform the necessary action to provide assistance to the remote user as needed. However, note that they can still use their keyboard and mouse to take over, which may hinder your remote work.
Now that you have successfully established a connection, let us show you the tools which the assistor can use on the remote computer using Quick Assist.
Tools in Microsoft Quick Assist
Once a connection is established, the user on the PC providing the assistance will be able to see a toolbar at the top of the window.

The list below denotes the tools going left-to-right, and what each of those can be used for.
Select Monitor: If the remote PC has multiple monitors, you can switch between them using this tool.
Pen: You can use a pen in different colors to write or highlight a portion of the screen to instruct or talk to the remote user, which they will also be able to see.

Using the Pen tool in Quick Assist Actual Size: Fits the entire remote screen within the Quick Assist window, as per its actual resolution.
Toggle Instruction Channel: Using this tool, you can send and receive text messages across the two computers using Quick Assist.

Communicate using Instruction Channel in Quick Assist Restart: This command restarts the remote computer and then reconnects to it using Quick Assist. Although this method does not require connecting using a new code, it still requires the remote PC user to allow you to establish a connection again.
Task Manager: This button opens the Task Manager without needing to press any shortcut keys or search for it.
Pause: This will pause the remote desktop connection and you will no longer be able to view the remote computer unless the connection is Resume.
Note that the user on the remote computer can also pause the connection by clicking the Pause button visible to them inside their toolbar.

Quick Assist toolbar on Remote computer Leave: This will terminate the remote connection.
When selecting most of the tools discussed above, you need to exit them before using another tool.
Up until now, we have discussed everything there is you need to know to use Microsoft Quick Assist. However, if you do not have one on your PC, you can install it from Microsoft Store.
Download and Install Microsoft Quick Assist
Perform the following steps to install Quick Assist in case it has been deleted, or you do not have one:
Open the Microsoft Quick Assist page in Microsoft Store using any web browser.
Click “Get in Store app.”

Get Quick Assist from Microsoft Store Now click “Open Microsoft Store.”

Open Microsoft Store The Microsoft Store app will now launch.
Click Install.

Install Quick Assist
Microsoft Store will now download and install Quick Assist on your computer, which you may then open directly from the Store app by clicking “Open,” by searching for it in the Start menu or using the CTRL + Windows Key + Q hotkeys.
Uninstall Microsoft Quick Assist
If you do not use Microsoft Quick Assist, you can remove it from your PC just like any regular app. Here’s how:
Navigate to:
Settings app >> Apps >> Installed apps
Search for Quick Assist.

Search for Quick Assist Click on the 3 dots in front of the app and then click Uninstall.

Uninstall Quick Assist Click “Uninstall” again.

Confirm uninstallation
The app will now be removed from your computer.
If needed, you can download ita gain from Microsoft Store when needed.
Final Verdict
If you are not looking to SSH or Telnet to other computers and mostly have to establish remote connections to Windows computers, then Quick Assist might be ideal for you.
Since it is a Windows native app, you do not have to download/install any third-party applications. Plus, the app uses secure encryption to keep your connection safe and reliable. Of course, it would help if both the computers had a good internet connection.
Let us know what you think of the Quick Assist app in the comments below, and how it compares to other remote desktop applications.
Frequently Asked Questions (FAQs)
Why are there two Quick Assist apps on my computer?
Microsoft moved the Quick Assist app to Microsoft Store a while back. It may be possible that you have both the new and old versions of the app installed on your computer. In this case, it is safe to uninstall the legacy Quick Assist app and continue with the new one.
Can you connect to a remote computer using Quick Assist with automatic authentication?
At the moment, you need a person present on the remote computer to allow you to connect to it using Quick Assist. Unfortunately, unlike TeamViewer, you cannot set a permanent password on the remote computer and allow automatic authentication using Quick Assist.


