Microsoft has programmed both Windows 11 and Windows 10 to automatically download and install Windows updates. This is best practice because these updates include new features and security patches required to protect your PC and network from external threats.
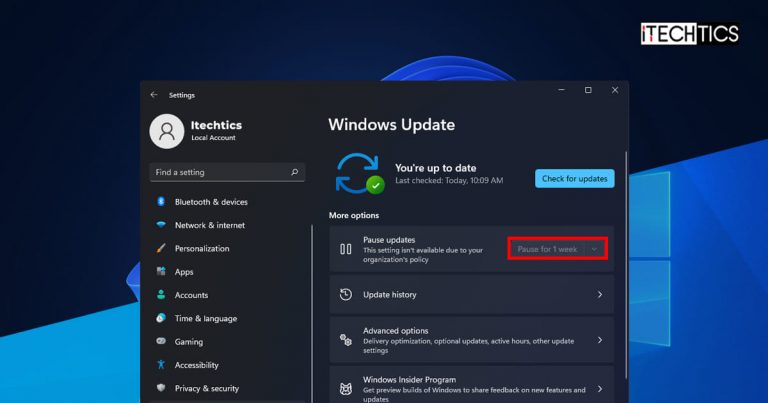
However, these updates can be paused using different methods. One of these methods includes pausing an update through the Windows Update Settings page. But what if you find the option grayed out?

This method is ideal if you want to pause Windows updates for 7 to 35 days. However, the option to do so may be grayed out due to an organizational policy of which your PC is part of or a misconfiguration of a Group Policy or Windows Registry.
This article illustrates two methods to restore the “Pause updates” option, so you can manage it as you please.
Table of Contents
Fix Pause Windows Updates Option Grayed Out Using Group Policy
One of the methods to fix the “Pause updates” grayed-out option is through the Group Policy Editor in Windows 11/10. Here is how:
- Open the Group Policy Editor by typing in gpedit.msc in Run.

- Now navigate to the following from the left pane:
Computer Configuration >> Administrative Templates >> Windows Components >> Windows Update >> Manage end user experience - From the right pane, double-click “Remove access to “Pause updates” feature.”

- From the popup properties window, select either Not Configured or Disabled radio button and click Apply and Ok.

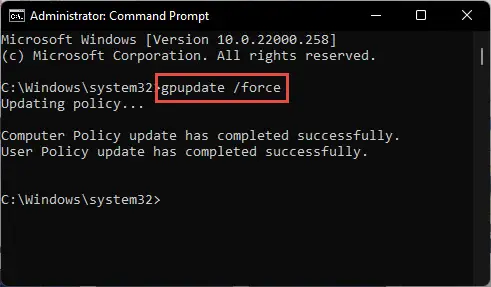
- Now open Command Prompt with administrative rights, and run the following command for the change to take effect:
gpupdate /force
You should now see that the option to pause updates has been restored on the Windows Update Settings page. If this does not work for you, you can proceed to the next section of this post to fix the issue from Windows Registry.
Fix Pause Windows Updates Option Grayed Out Using Windows Registry
This process includes manual reconfiguration of Windows Registries. Misconfiguration of critical values in the system’s registry could be fatal for your operating system. Therefore, we insist that you create a system restore point before proceeding forward with the process.
Perform the following steps to fix the “Pause updates” option using the Registry Editor:
- Open the Registry Editor by typing in regedit in Run.

- Now paste the following into the address bar at the top for quick navigation:
Computer\HKEY_LOCAL_MACHINE\SOFTWARE\Policies\Microsoft\Windows\WindowsUpdate
- Now right-click the DWORD “SetDisabledPauseUXAccess” and click Delete from the context menu.

- From the confirmation box, click Yes.

- Now restart your computer for the changes to take effect.
Once the computer reboots, you will see that the “Pause updates” option is no longer grayed out.
Closing Words
The methods to restore the “Pause updates” option on the Windows Update Settings page we have discussed in this post are valid for both Windows 11 and 10.
Furthermore, you can also choose to pause the update for 365 days or permanently block your operating system from updating to the next version.


1 comment
john
what if there is no Manage end user experience on my end?