If you want to use UEFI boot mode instead of BIOS, you will need to convert MBR to GPT. While it’s easier to select UEFI directly when you are installing Windows, it becomes tricky when you are using Windows and want to convert MBR to GPT without losing your data.
Master Boot Record or MBR for short, and GUID Partition Table (GPT) are both partition styles of computers running Windows. There are several differences between the two.
MBR supports up to 2TB of partition size with a maximum of four primary partitions. MBR is an older partition format which was used along with BIOS startup.
GPT partition style has the ability to manage 128 primary partitions and 256TB of partition size.
Table of Contents
MBR vs GPT
Here is a quick reference of which partition format is better for you.
| Features | MBR | GPT |
|---|---|---|
| Maximum storage capacity | 2TB (upto 4TB for NTFS) | No disk capacity limitation |
| Boot mode | BIOS | UEFI |
| Compatibility | All Windows and Windows Server versions from Windows NT to Windows 10 and Windows Server 2019 | Windows 7, 8, 8.1, 10 Windows Server 2008, 2012, 2016, 2019 |
| Security | Easy to configure with no security features | More secure |
| Data safety | More prone to errors because the boot records are stored on the same partition | Less prone to errors and data recovery is possible as CRC information is stored in a separate partition. |
There are three basic methods for converting MBR to GPT disk while preventing data loss. We will detail all of them below. It is highly recommended that users back up their data before performing any of the following operations to be on the safer side.
Furthermore, make sure that if you are converting systems disk to GPT, then your motherboard should be able to support EFI/UEFI boot mode.
Convert MBR to GPT using Diskpart utility
The first method is to simply use Diskpart. Diskpart is the replacement of fdisk and has been included as a utility in Windows operating systems since Windows 2000. It allows for command-line disk partitioning and it can be used to easily convert MBR to GPT partition without any risk to data. The steps for this are as follows.
- Open the Run dialog (Windows key + R), type diskpart and click OK. This will open the diskpart command-line utility.

- You can also open the command prompt during Windows installation. Just press Shift + F10. Then type diskpart and press Enter to open the command-line utility. (This step is only required if you are booting Windows from a USB or DVD drive.)
- Run the command list disk. This will display all the hard drives connected to the PC.

- Run the command select disk X (X being the number of the MBR disk you want to convert to GPT). This selects the required hard disk.

- Run the command convert gpt. This will convert the target to GPT.

Convert MBR to GPT Using Disk Management
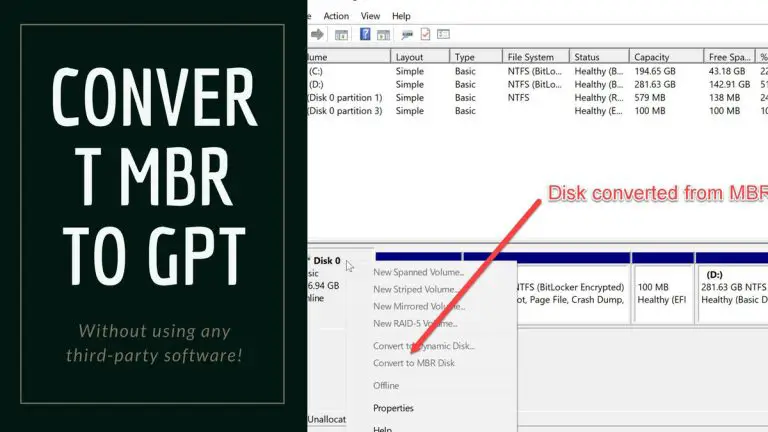
The second method commonly used to convert MBR to GPT without losing data is to use Disk Management.
Disk Management is also included in Windows. It is a graphical tool as opposed to diskpart.
As it allows viewing and management of disk drives on a PC, it can also be used to convert MBR to GPT without data loss. Simply follow the steps given below to convert an MBR disk to GPT.
- Open the Run dialog (Windows key + R) and type diskmgmt.msc. This will open the Disk Management console.
- Select the disk you want to convert and then go to Actions menu –> All tasks –> Convert to GPT. This will convert MBR to GPT.
Please note that if your disk is already GPT, you will get an option to convert GPT to MBR.
One more thing to note here is that the graphical tool will not be able to convert the system disk (where Windows is installed) to GPT or MBR.
If you want to convert the system disk, you may use the next method which is using the mbr2gpt tool.
Convert MBR To GPT Using MBR2GPT Tool
These are the methods that use utilities available within Windows 10 that anyone can use. If you want even more control over the conversion process, you can use the MBR2GPT tool included in the later versions of Windows 10, build 1703 and above.
This tool has been designed to be run from Windows PE (Preinstallation Environment), however, the /allowFullOS command can be used to run it from the full operating system.
However, it is recommended that it is run before you convert the BIOS to UEFI, in WinPE. Any errors after the firmware has been converted can brick the PC until manual conversion back to BIOS is successful.
As this tool is for a specific task, we will run a checklist before executing the convert command, this includes the following: Failing any of the checks will not run the command.
- Current partition: Must be MBR, and of a type that Windows 10 can recognize. If not, then you need to specify mapping using /map.
- Space required by both primary and secondary GPT’s (16KB + 2 sectors at the front, while 16KB + 1 sector at the end)
- The number of primary partitions on target does not exceed 3
- One partition is set active and configured as system partition, while the BCD store has a default OS and that in turn directs to the OS partition.
- No logical partitions.
- All volumes have valid, retrievable volume ID’s with drive letters.
Use the following commands to run the tool, depending on the environment.
If you are running the tool on WinPE, use the following command
mbr2gpt /convert /disk: X
X is the disk number you have from diskpart
If you are running Windows 10, use the following command
mbr2gpt /convert /disk: X /allowfullOS
X is the disk number you have from diskpart
Conclusion
I’ve had great success using the mbr2gpt tool. While the first two methods are good for converting non-system hard drives from MBR partition style to GPT, mbr2gpt is the ultimate tool for converting any kind of drive to GPT.
There are third party tools like MiniTool Partition Wizard, Disk Genius, Partition Magic that can easily and safely convert any type of partition style.
I recommend using these tools only if you are not using the latest version of Windows 10 or if you want to use a visual tool for easy conversion without data loss.


