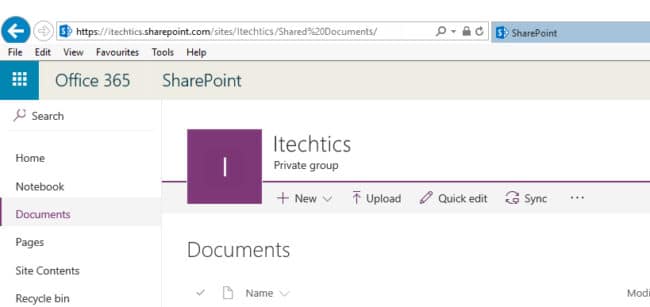
Microsoft SharePoint is an excellent utility when it comes to sharing data with other people that is also secure. It is even more convenient when it is mapped directly to your computer and you can access it like it was a folder saved locally on your own computer, even though it is situated on the cloud.
However, the process of mapping it using File Explorer in Windows 10 may not be as simple. Since SharePoint comes with an Office 365 subscription, it needs to be accessed using Internet Explorer 10 or Internet Explorer 11. Sharepoint network sharing only supports Internet Explorer. No other browser can be used to configure the shared folder.
Due to Microsoft’s redirection policy in Microsoft Edge, any modern website will be redirected to Microsoft Edge instead and cannot be accessed using IE 11 by default.
This article illustrates how you can still manage to map your SharePoint library on your computer for ease of access and convenience.
Table of Contents
What is Microsoft SharePoint
SharePoint is like a centralized location to store all your files and documents to be shared with numerous people simultaneously. It is mostly used by organizations so that the updated version of the items are instantaneously accessible by another person that has access.
As we mentioned, Microsoft SharePoint is one of the tools included in Office 365. If an organization has a license, the SharePoint library can then be mapped to each computer using the Office 365 credentials.
Mapping SharePoint on any computer should have been a piece of cake. However, due to certain conditions by Microsoft, the process has gotten a bit complicated.
This article will guide you through the entire process of mapping the Microsoft SharePoint library to your computer.
How to map Microsoft SharePoint in Windows 10
There are a few steps that need to be performed to map the SharePoint library in your Explorer. Here is a summary:
- First, we need to open the Office 365 portal in Internet Explorer 10 or 11 to ensure that the website is open in IE and is not redirected to Edge, which it does by default. Once done, we need to copy the URL from the address bar.
- Next, we must add the SharePoint website to Trusted Sites on IE to ensure an uninterrupted connection over the internet when it is mapped.
- Now all that is remaining is to map the library using File Explorer.
Let us now continue to perform the steps mentioned above.
Open Office 365 portal in Internet Explorer on Windows 10
Since most new, modern websites are not being designed according to Internet Explorer, Microsoft has started to redirect such links to Microsoft Edge automatically, while IE prompts you that the website you are accessing would be better off in Edge.

You are also prompted with the same while trying to access Office 365’s online portal in Internet Explorer 11 on a Windows 10 PC, while Microsoft Edge automatically launches with the link. Follow the steps below to stop this redirection to Edge and open it in IE.
Ensure IE 11 is enabled on Windows 10
The first thing to do is to ensure that Internet Explorer is enabled on your PC. It is enabled by default, but if you cannot find it while searching in the Search Box, it may be possible that IE has been disabled.
Follow the steps below to enable IE 11 on your Windows 10 PC.
- Navigate to the following:
Control Panel -> Programs -> Programs and Features - Now click on Turn Windows feature on or off on the left.

- In the Windows features popup window, check the box next to Internet Explorer 11 and click OK.

The activation wizard will now launch and install IE 11 on your computer.
Disable redirection to Microsoft Edge from Internet Explorer
Disable redirection using Edge Settings
Now that you know that IE 11 is available on your PC, it’s time to disable its redirection policy. One way to disable this redirection to Edge is through the Edge’s settings itself.
- Open Microsoft Edge on your computer and click on the ellipses (3 dots) in the top-right corner.

- From the menu, click Settings.

- On the Settings page, click Default browser on the left.

- Open the drop-down menu in front of “Let Internet Explorer open sites in Microsoft Edge” and select Never.

You can try re-opening the Office 365 portal in IE and it should open just fine.
Disable redirection using Registry Editor
Time and time again we revert to the Registry Editor to make changes to our computer. Follow the steps below to disable redirection from Internet Explorer to Microsoft Edge using the Registry Editor in Windows 10. Remember that the wrong configuration can send your OS crashing. Therefore, we recommend that you create a system restore point before proceeding forward.
- Launch the Registry Editor by typing in regedit in Run.

- Now navigate to the following location through the left pane:
HKEY_Local_Machine -> Software -> Microsoft -> Windows -> CurrentVersion -> Policies -> Ext -> CLSID.
- Now double-click the String Value in the left pane by the name {1FD49718-1D00-4B19-AF5F-070AF6D5D54C}, and change its Value Data to 0. Click Ok.

- Reboot your computer for the changes to take effect.
Once the computer restarts, the Office 365 online portal should now open in IE.
Once on Office-365’s login page on IE 11, enter your credentials to login and then click the SharePoint button from the menu on the left.

Now copy the complete URL from the address bar and save it.

Now we can proceed to the next step.
Add SharePoint website to Trusted Sites
We must now add the root website to Trusted Sites in Internet Explorer so that it can be mapped using File Explorer as the next step.
- To add it to the Trusted Website section, go to Internet Properties by typing in inetcpl.cpl in Run.

- Now switch to the Security tab, click Trusted Sites, and then click the Sites button.

- Now enter the following URL in the text field below “Add this website to the zone”, then click Add:
https://itechtics.sharepoint.com
- Now close all windows by clicking Close or Ok.
The root URL is added because then we do not need to individually specify each complete URL to each document. Once added, you can then proceed to the next and final step.
Map SharePoint library using File Explorer
You can now map the library to your Windows 10 PC as if it were a local item. Follow the guide below to map it:
- Open File Explorer and click on Map network drive at the top.

- In the Map network drive window, paste the complete URL to the SharePoint folder that you have saved in the initial step in the text field, and click Finish.

- You will now be asked to enter your credentials for Office 365. Enter them and the drive should then be mapped to your PC.

Closing words
Once the SharePoint library is mapped, you can create its shortcut(s) from the context menu and place them at any location for instant access.
Users all across your organization can then make changes to the files and folders within the mapped location. This is a great feature to have in case multiple teams or individuals are working on the same project.


1 comment
Humberto T
The really question would be with IE 11 going away how can you continue using the network drive as a option.