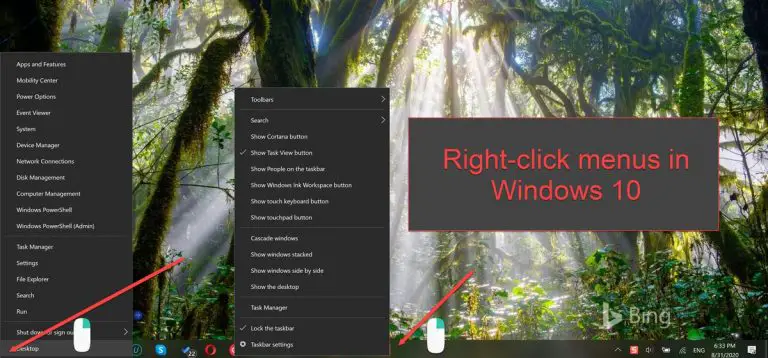
Apart from the significant purposes the Start Menu serves, right-clicking on it opens another set of options for the users. Similarly, right-clicking on the Taskbar also provides a Context Menu for the users to gain instant access to several settings and customization options.
Sometimes the right-click just stops working specifically on the Start Menu and/or the taskbar. This is normally due to Windows Explorer being unresponsive but can extend to a number of other factors like corrupt system files, malfunctioning processes or irregularities in Windows Registry.
Table of Contents
If by right-clicking on the taskbar or the Start Menu you do not get a context menu, you might also be facing the same problem with your version of Windows. This article discusses how it can be fixed through restarting processes and replacing corrupt files.

Fix right-click context menu on the Start Menu and Taskbar by restarting Explorer
Windows File Explorer is what runs the graphical interface in Windows. Sometimes it requires a quick restart for everything to work normally again.
You can restart the Explorer process by opening the Task Manager and navigate to the Processes tab.
Under the tab, look for Windows Explorer, right-click it and then click on Restart.
This should restart File Explorer as well as the process running the task, including every operation utilizing the explorer.exe process. Since the Context Menu also runs using the explorer.exe process, it will also restart, enabling it to function as usual.
Here are a few other ways to restart the explorer.exe process without rebooting the computer.
Fix the right-click Context Menu on the Start Menu and Taskbar through Registry Editor
The Registry Editor is a useful built-in tool in Windows 10 which can be manipulated to the user’s advantage. Here, we will use it to correct the right-click response on the Taskbar and Start Menu by performing the following:
- Go to Run –> regedit. This will open the Registry editor.
- In the left pane, navigate to the following folder:
HKEY_Local_Machine -> Software -> Microsoft -> Windows -> CurrentVersion -> ImmersiveShell -> Launcher - Right-click on Launcher, expand to New, and then click on DWORD (32-Bit) Value.

- Name the new DWORD as UseExperience.
- Double-click the DWORD you have just created and set the Value Data to 0.

- When done, click Ok and restart the computer.
Check to see if the issue has been resolved. You may need to restart your computer for changes to take effect.
Fix the right-click Context Menu on the Start Menu and Taskbar through PowerShell
PowerShell is a command line interface in Windows that let’s its users automate tasks and configure settings on their local computer. Using this scripting tool, we can retrieve and install a package that will fix the right-click’s response on the Taskbar as well as the Start Menu.
Run the PowerShell with Administrative privileges by searching for it in the Start Menu, then right-click it and click on Run as administrator.
Here are a few other ways to always run PowerShell with Administrative privileges.
Now enter the following command:
Get-AppXPackage -AllUsers | Foreach {Add-AppxPackage -DisableDevelopmentMode -Register “$($_.InstallLocation)\AppXManifest.xml”}
A list of packages could then be seen installed, and the process should not take more than 5 minutes. You may also be prompted by some errors which can be ignored.
After the complete executing of the command, check to see if the issue is resolved. If not, we still have a trick up our sleeves.
Fix the right-click Context Menu on the Start Menu and Taskbar by replacing the WinX folder
If none of the steps above have resolved the problem, then it might mean that the contents within the WinX folder have been permanently corrupted or damaged. Let’s see how we can replace the content to fix the issue.
Navigate to the WinX folder within your local computer by copying the following command and pasting it in File Explorer.%USERPROFILE%\AppData\Local\Microsoft\Windows\WinX
The command will then change the directory to WinX within your local user profile.
Now simply overwrite the folders named Group1, Group2, and Group3 with similar folders that can be found in the same location in other user profiles. If you do not have other profiles, you can temporarily create one, or copy the files from another computer running the same version of the Operating System.
Which of these methods had worked for you?


8 comments
Ami Meron
with “process explorer” tool, right click “Explorer” process->restart>>>shazam…
:)
Anonymous
the winx method worked perfecly
MetaT
Powershell approach fixed the problem. Thank you.
Turkanet
powershell figured out
Alison
I want to NOT see the long (long) list of ‘recent files’/’most visited’ that I see when I right-click on an item on the taskbar. However, I DO want the PC to remember my recent files, which I can view by going to C:\Users\Me\AppData\Roaming\Microsoft\Windows\Recent. Is there any way of seeing the contents of the Recent folder without also seeing these long lists on Taskbar-right-click?
Mikadu68
Merci beaucoup ! you save me !
Abdul Hafeel
The “Replace Winx” method worked for me. Thanks
Amirali
With powershell fixing.