The Microsoft Store offers a wide range of applications which include games, tools, and other programs. Some of these applications are preinstalled in both Windows 10 and Windows 11 by default. This is also kept updated by Microsoft and your system automatically installs these updates when they are available.
Most of the time, a Windows user would not even notice that their internet bandwidth is being consumed because of these updates being installed in the background.
By default, your PC is set to update the apps automatically. However, you can disable this feature and choose whether to update or when to update the app.
This post will show you 5 ways to disable the automatic update of the Store apps, as well as how you can enable the feature if required.
Table of Contents
Why Disable Automatic Updates for Microsoft Store Apps
However, we do not recommend that you disable the automatic feature update as it is important to keep the apps updated, and Windows does it automatically for us. That being said, there can be certain scenarios where you must disable these automatic updates.
It may be possible that you are connected to a metered connection and every byte of downloading is costing you.
Another reason for turning off automatic application updates is because it may be consuming too much of your internet bandwidth and is hogging the line. Or maybe you are simply not a fan of the upcoming update for the app and would like to keep the current version of it.
If such is the case, continue reading to learn how to switch off auto-updates for Store apps.
How to Enable/Disable Automatic Updates for Store Apps in Windows
Enable/Disable Automatic Updates for Apps Through Microsoft Store
The most convenient way to enable or disable the automatic update feature for the Store apps is through the Microsoft Store app itself. Here is how to do so:
- Open the Microsoft Store app by searching for it in the Search box.
- Click on your profile icon at the top, and then click App settings.

- Now toggle the slider in front of App updates to the off state by clicking on it.

Automatic updates will now be disabled. You can also turn the feature on by clicking on the slider again.
Enable/Disable Automatic Updates for Apps using Group Policy
Another way to manage automatic updates for the Store applications is through the Group Policy Editor in Windows. Here is how:
- Open the Group Policy Editor by typing in gpedit.msc in Run.
- Now navigate to the following from the left pane:
Local Computer Policy >> Computer Configuration >> Administrative Templates >> Windows Components >> Store - On the right side, double-click Turn off Automatic Download and Install of updates.

- Now select the Enabled radio button to turn the feature off. Then click Apply and Ok.

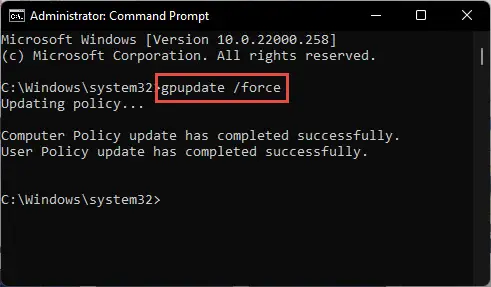
- Now launch the Command Prompt with administrative privileges and paste the following command for the changes to take effect.
gpupdate /force
You will now have successfully disabled automatic updates for the Microsoft Store apps. This technique would have also greyed out the option to enable or disable the feature through Microsoft Store as discussed in the last section.
To enable automatic updates for the apps, simply return to the Group Policy Object (GPO) and select the Not Configured or Disabled radio button.
Enable/Disable Automatic Updates for Apps Through Windows Registry
The steps below illustrate how to turn the automatic updates for Microsoft Store apps off:
Any misconfiguration of the Windows Registry could turn fatal for your operating system. Therefore, we recommend that you create a system restore point before proceeding forward.
- Launch the Windows Registry Editor by typing in regedit in Run.
- Now paste the following into the address box at the top of the Editor for quick navigation:
Computer\HKEY_LOCAL_MACHINE\SOFTWARE\Policies\Microsoft
- Right-click Microsoft, expand New, and then click Key.

- Name the new key “WindowsStore.” Then right-click WindowsStore, expand New, and click DWORD (32-bit) Value.

- Name this new DWORD “AutoDownload.”
- Now double-click AutoDownload in the right pane. Set their Value Data to 2 and click Ok.

- Now restart your computer for the changes to take effect.
Once the computer reboots, you can confirm that the automatic updates for the apps have been disabled by checking that the App updates option in the Microsoft Store has been disabled.
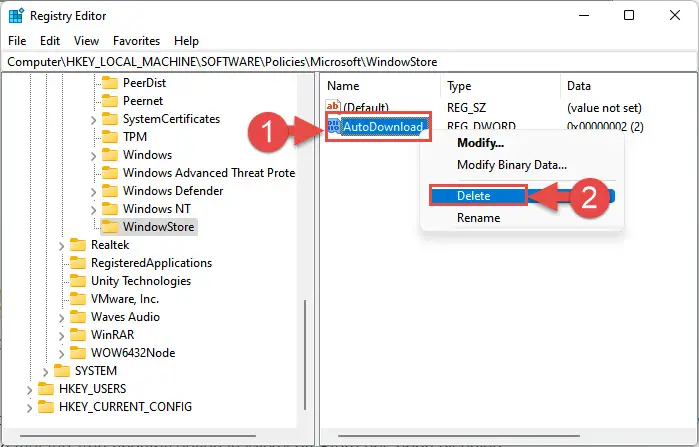
If you want to re-enable the feature, simply delete the DWORD you have created in step 4 above and restart your PC.

Enable/Disable Automatic Updates for Apps using Registry File
Alternatively, you can download the respective Windows Registry files below to implement the changes for you. All you need to do is extract the contents and then run the .reg file by double-clicking it.
Enable/Disable Automatic Updates for Apps Through Command Prompt
To turn off automatic updates using the Command Prompt, run it with administrative privileges and run the following command:
reg add HKLM\SOFTWARE\Policies\Microsoft\WindowsStore /v AutoDownload /t REG_DWORD /d 2 /f

You can also turn the feature on using the following command:
reg add HKLM\SOFTWARE\Policies\Microsoft\WindowsStore /v AutoDownload /t REG_DWORD /d 4 /f

This concludes all the possible methods to manage your automatic updates for the Store applications. If you have disabled the feature, you can still update the apps manually using the guide given below.
Manually Update Microsoft Store Apps
Here is how you can manually update the Microsoft Store applications even when the auto-update feature is disabled:
- Open the Microsoft Store application and click on the Library icon on the left.

- Now click Get updates.

Your Store application will now begin updating if there are any available.
Final Thoughts
As we said earlier, we do not recommend that you disable the automatic updates for Microsoft Store apps. The updates often include security updates which are crucial to keeping your system safe from threats and attacks.
If you do turn off the feature, we suggest that you occasionally update them manually using the given guide in this post.


