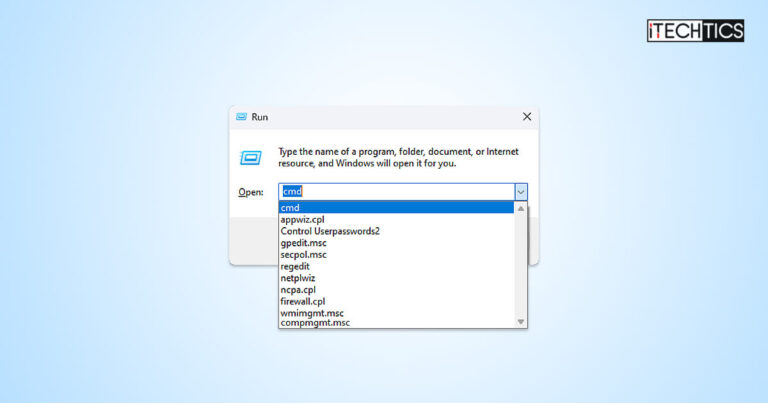
The Run Command box has been around since Windows 95. It is an excellent tool to instantly access other Windows tools, files and folders, apps, and programs, and even modify the Windows Registry. By default, all Windows OS versions store the history of the commands entered into the Run Command box. You can then use the stored history later to provide the same text and command quickly. This feature is known as “auto-suggestion.”
When you start typing in another command, a dropdown will appear with recently used entries. Here is an example:

You can then use your mouse or the up/down arrow keys to scroll through similar suggestions, and then hit “Enter” on the command that you want to run again.
However, in some cases, the auto-suggestion feature might be turned off by the owner of the PC, or your organization. In other instances, you may want to disable the auto-suggestions feature of the Run Command box simply because the list is too long or you wish to keep it enabled and only clear the history for a fresh start.
In this article, we will show you how to delete/clear the Run dialog box history, and how to enable or disable the feature completely.
Table of Contents
Clear Run Command History
If you only want to clear the Command history, you can use the following steps to do it. Performing these steps will clear your current history and create room for new and fresh commands to be saved. The given method works for Windows 7, Windows 8 and 8.1, and Windows 10 and 11.
Note: The following steps involve manual changes to the Windows Registry. Misconfiguration of critical values in the system’s registry could be fatal for your operating system. Therefore, we insist that you create a system restore point before proceeding forward with the process.
You can also use our top selection of disk imaging and backup software so you never lose your data or operating system again.
Open the Windows Registry Editor by typing in “regedit” in the Run Command box.

Open the Registry Editor Paste the following into the address bar for quick navigation:
HKEY_CURRENT_USER\SOFTWARE\Microsoft\Windows\CurrentVersion\Explorer\RunMRU

Navigate to the RunMRU Registry key Here, you will see the command history saved in the right-hand pane inside different string values.
Right-click the “RunMRU” key and click “Delete” from the context menu.

Delete the RunMRU key When asked for confirmation, click Yes.

Confirm action Close the Registry editor.
Now, when you open the Run Command box, you will notice that the text field is empty, and so are all of the suggestions.

Disable Run Command History
If you want to enable or disable the auto-suggestions feature, there are two methods for it. One is achieved using the Settings app, while the other involves modifying the Windows Registry. We suggest you only use it if the former method doesn’t work for you.
Disable Run Command History from Settings
Perform the following steps to enable or disable the Run Command history using the Settings app. Note that this method is only valid for Windows 8, 10, and Windows 11 since the Settings app isn’t available on Windows 7.
Go to the following:
Settings app >> Privacy & security >> General
Toggle the slider in front of “Let Windows improve Start and Search Results by tracking app launches” into the respective position to enable or disable the auto-suggestion feature:
If you have just enabled the Run Command box’s history, every command you enter from now on will be saved. If you just disable it, you will find the text field empty in the Run Command box, as will the drop-down menu.
Enable or Disable Run Command History from Registry
If your organization or system administrator manages your Windows Settings, you can use the following steps to enable or disable the feature by tweaking the Windows Registry. These steps can be used in all Windows versions launched since (and including) Windows 7.
Open the Windows Registry Editor by typing in “regedit” in the Run Command box.

Open the Registry Editor Paste the following into the address bar for quick navigation:
Computer\HKEY_CURRENT_USER\Software\Microsoft\Windows\CurrentVersion\Explorer\Advanced

Navigate to the Advanced Registry key Double-click the “Start_TrackProgs” value and change its Value Data to the following number, depending on whether you want to enable or disable the history.
Close Registry Editor.
If you have just enabled the Run Command box’s history, every command you enter from now on will be saved. If you just disable it, you will find the text field in the Run Command box is empty, as will the drop-down menu.
Note that performing these steps inside the Windows Registry does not require a system reboot. Additionally, you can still manage the settings from the Settings app, as given in the steps above.
Closing Thoughts
This article highlights the methods to manage the Command Box’s history storage on a Windows PC. You can either clear the history, enable or disable the feature altogether. Do not confuse this article with disabling the Run Command box; that is a different thing.
That said, we found that some online tutorials also ask you to disable the “Show most used apps” feature in Settings >> Personalization >> Start. Note that enabling or disabling this feature will have no effect on the Run Command box’s history. However, the methods discussed in this post have been tried and tested to work effectively.


