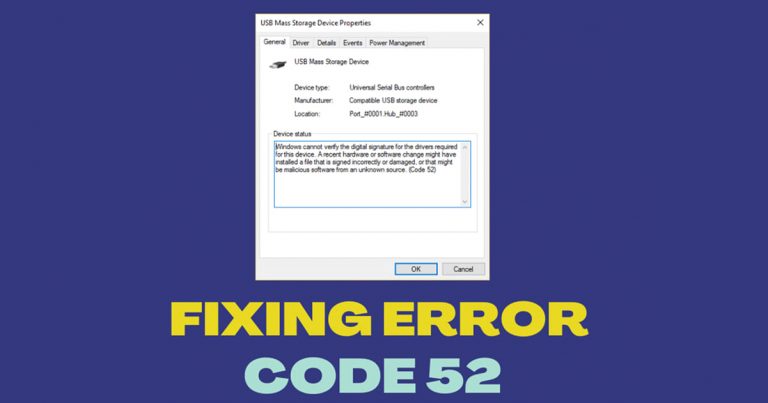
Windows provides different error codes for different types of errors. These codes can be useful in identifying the root cause of the problem and then resolving it. You may get the following error while running a device/component in Windows 11/10:
Windows cannot verify the digital signature for the drivers required for this device. A recent hardware or software change might have installed a file that is signed incorrectly or damaged, or that might be malicious software from an unknown source. (Code 52)

This error was prevalent in Windows 7 but has been reported on Windows 10 and even Windows 11 systems. Most modern components of the PC are automatically installed by Windows 10/11. However, some specific hardware devices may have corrupted drivers or nonstandard drivers might have been installed. As a result, Windows may display Error code 52.
Table of Contents
What is Error Code 52?
In general, error code 52 indicates that Windows is unable to verify the authenticity of the driver installed. As a result, the device cannot be started under Windows. Driver verification is done through the Driver Digital Signature system.
What is Driver Digital Signature?
Windows uses Driver Digital Signatures to verify the legitimacy of device drivers. Microsoft requires hardware vendors to verify their drivers before they can be installed on Windows. In the event that any driver is not verified, Windows will display the above-mentioned error code 52.
Since Driver Digital Signature is a paid service from Microsoft, small vendors do not get their device drivers verified. This is especially the case for USB drivers.
Error Code 52 Solutions
Once the problem has been identified, a solution is straightforward. Given that we know the root cause of the error message is a lack of a proper driver, let’s explore the solution steps here.
You may want to back up the installed drivers before proceeding with the uninstall and reinstall steps below.
Disable Driver Signature Enforcement using Command Prompt
Microsoft gives users the option to disable driver signature enforcement. If you disable this option, Windows will accept all drivers installed in the system, whether they are signed by Microsoft or not verified.
To disable driver signature enforcement, follow the steps below:
-
Launch an elevated Command Prompt.
-
Run the following commands one after the other:
bcdedit.exe -set loadoptions DISABLE_INTEGRITY_CHECKS
bcdedit.exe -set TESTSIGNING ON
Disable signature enforcement
You will need to restart your system after successfully running the commands.
If you see the following error when running the cmdlets above, then you must try disabling the driver signature enforcement using the Windows Recovery Environment (WinRE) for which the method is shared in the next section.
An error has occured setting the element data. The value is protected by Secure Boot policy and cannot be modified or deleted.
Disable Driver Signature Enforcement using WinRE
Follow these steps to disable the driver signature enforcement using WinRE:
-
Hold down the power button for 10 seconds to switch the machine off forcefully.
-
Turn it back on again, and then repeat the process 3 times.
This will reboot Windows into the Windows Recovery Environment (WinRE).
-
Navigate to the following:
Troubleshoot >> Advanced Options >> Startup Settings >> Restart
The device will now restart again. This time, you will be presented with a list of options you can choose from by using the function keys on the keyboard (F1-F9).
-
Press the key that says “Disable drive signature enforcement” (F7).

Disable driver signature enforcement
This procedure to disable driver signature enforcement is the same for all versions of Windows, including Windows 7, Windows 8/8.1, Windows 10, and Windows 11.
Disable Code Signing for Device Drivers using Group Policy
If you find the aforementioned method difficult, you can also disable driver signature enforcement using Group Policy. Follow the steps below to get rid of error code 52:
-
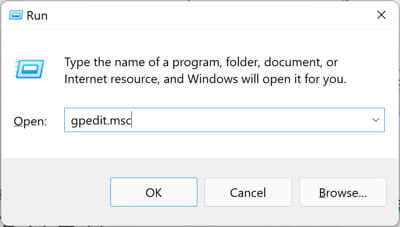
Open the Group Policy editor by typing in “gpedit.msc” in the Run Command box.

Open the Group Policy editor Note: If you are using the Home edition of Windows, learn how to install the Group Policy editor.
-
Go to the following from the left pane:
Local Computer Policy >> User Configuration >> Administrative Templates >> System >> Driver Installation
-
Double-click the policy “Code signing for driver packages.”

Open code signing policy -
Disable the policy.

Disable the policy Select the “Disabled” radio button, then click Apply and Ok.
Please note that this method may or may not work with Windows 10 or Windows 11. If this doesn’t work, you should follow the method given above earlier which surely works.
Delete USB’s Upper and Lower Filter Entries
If you are experiencing the error code 52 every time you connect a USB device, then you can mitigate the issue by deleting the upper filter and lower filter Registry entries. These filters are responsible for managing the device’s access request from third-party applications and can cause the error code 52.
Follow these steps to delete these entries inside the Registry:
Note: Misconfiguration of critical values in the system’s registry could be fatal for your operating system. Therefore, we insist that you create a system restore point before proceeding forward with the process.
You can also use our top selection of disk imaging and backup software so you never lose your data or operating system again.
-
Open the Registry editor by typing in “regedit” in the Run Command box.

Open the Registry editor -
Paste the following in the address bar for quick navigation:
Computer\HKEY_LOCAL_MACHINE\SYSTEM\CurrentControlSet\Control\Class\{4d36e967-e325-11ce-bfc1-08002be10318}
Open the USB filters key inside Registry editor -
Right-click “UpperFilters” and then click Delete.

Delete UpperFilters -
Confirm the action by clicking Yes.

Confirm action -
Repeat Steps 3 & 4 for “LowerFilters.”

Delete LowerFilters -
Restart the computer.
When the computer reboots, check to see if you still encounter the same error code 52 when connecting the USB.
Install a Verified Driver
The best way to tackle error code 52 is to install a verified driver from the vendor (given that the vendor offers one).
To install a new device driver, you will need to uninstall the existing installed driver first. To uninstall the existing driver, follow these steps:
-
Open the Device Manager by typing in “devmgmt.msc” in the Run Command box.

Open the Device Manager -
Expand the respective category, right-click on the device and open its Properties.

Open device properties -
Switch to the “Driver” tab.

Go to Driver tab -
Click “Uninstall Device.”

Uninstall device This will uninstall the driver.
Once you have uninstalled the device driver, Windows will try to find the appropriate driver and automatically install it for you. You can also download and install the latest device drivers automatically using third-party software. Otherwise, you can download the drivers directly from the vendor’s website.
Here’s how you can identify unknown devices in Windows.
Once you have installed a custom driver, you should disable automatic driver updates in Windows to make sure Windows does not replace the installed drivers.
Takeaway
Disabling driver signing is an advanced option and should be used with care. Make sure you trust the vendor before installing unverified drivers. For advanced users, the Dism++ utility can be used to disable automatic drivers signing in Windows using a Live bootable CD like LiveCD.
Have you encountered an error code 52 error on your system? Which drivers were the most problematic?


1 comment
urmom
I followed the steps, but I had to disable via BIOS the secure boot, then get back to windows, and reinstall and all worked ok but then if you want to go back to a secure boot again the device of that driver doesn’t work again.
is it possible to have it working with secure boot still protecting the system?