The Windows Firewall is an integral part of the Windows Operating System. It manages the traffic flowing through the network ports on your machine to ensure unnoticed packets do not enter your machine and keep it safe.
It is also responsible for opening and closing or listening to networking ports. Network ports are used by Windows services and applications to send and receive data over a network. It is likely that your application may not be receiving any data through a specified port because the Windows Firewall is blocking that particular port.
In this article, we are going to be discussing how you can check which ports your device is listening to, and which ones are being blocked by the Firewall. Once it is determined, you may then use that information to open a specific port.
Table of Contents
What does listening on port mean
Before we begin to check which ports are being blocked and which ones are listening, let us discuss what listening means for a computer.
By definition, a listening port is a networking port on which a process or an application listens. By listening, it means receiving information through packets. A listening port is an open port that accepts incoming packets and forwards them to the desired destination application/process.
A listening port does not mean that it is being allowed by the firewall. A listening port simply means that it is receiving some sort of traffic. However, that traffic can still be blocked by the firewall.
Check listening ports
Before checking for blocked ports, let us find out which ports your Windows device is listening to. This is because it could be possible that your application is not receiving any packets since the port that you think is being blocked by the Firewall is not listening at all.
To check for the listening ports on a Windows machine, launch the Command Prompt and then type in the following command:
netstat -a -n
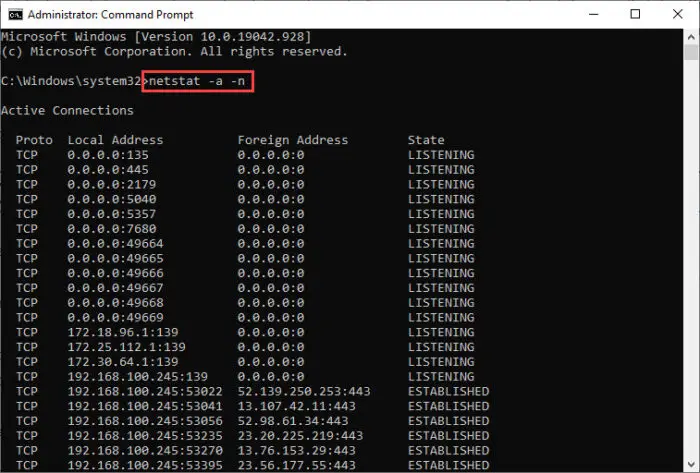
The ports that have their State listed as Listening are the ones listening to the network traffic. You can scroll down the list and look for the port you are interested in. Alternatively, you can also use the command below to look for a specific network port and check if it is listening or not. Replace PortNumber with the number of the port you are interested in.
netstat -ano | find "PortNumber" | find "LISTENING"
Here is an example of the command above:
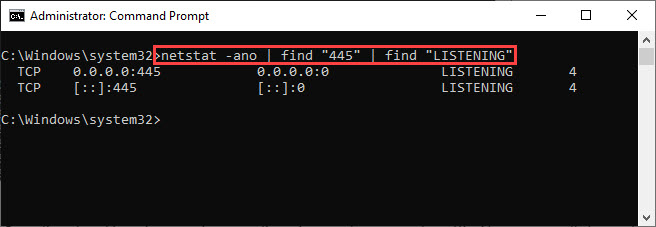
If you find any listings below the command, it means that the port you specified is listening. If the space is empty, it means that it could not find the port you mentioned, or if it did find it, it was not in the listening state.
Check if Windows Firewall is blocking ports
Check for blocked ports using Firewall logs
One way to check for any blocked ports is through the Windows Firewall logs. Logs are an important factor in determining the behavior of the Firewall. However, logging in for the dropped packets, which are the packets blocked by the Firewall, is disabled by default in Windows. These need to be active and then you can check the generated logs for the ports blocked.
Note that only those packets will be dropped if the port is listening, which can be checked using the method discussed earlier in the article.
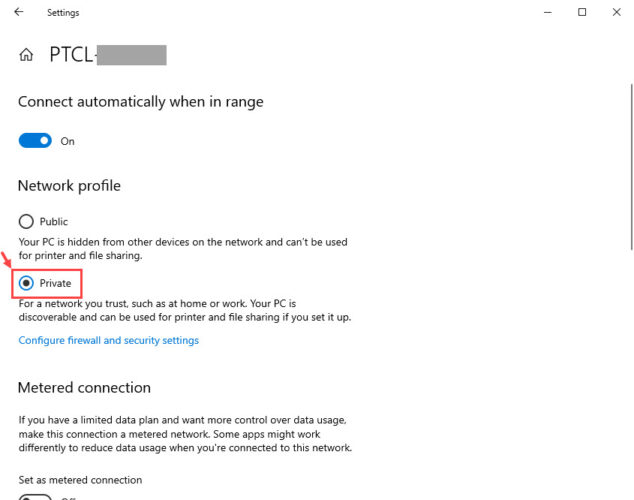
To generate logs for the dropped packets, you must first determine the network profile you are currently on. To do so, open the Network & Internet page in the Settings app (Run -> ms-settings:network-status) and then click on Properties below the network you are connected to.
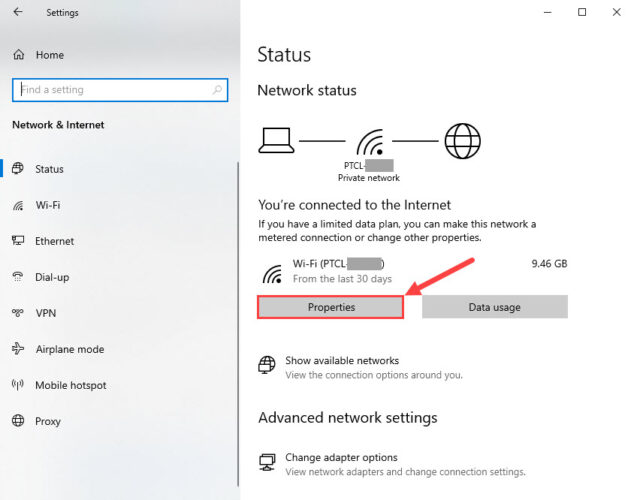
In the Properties page, you will see whether the selected profile is Public, Private, or Domain.
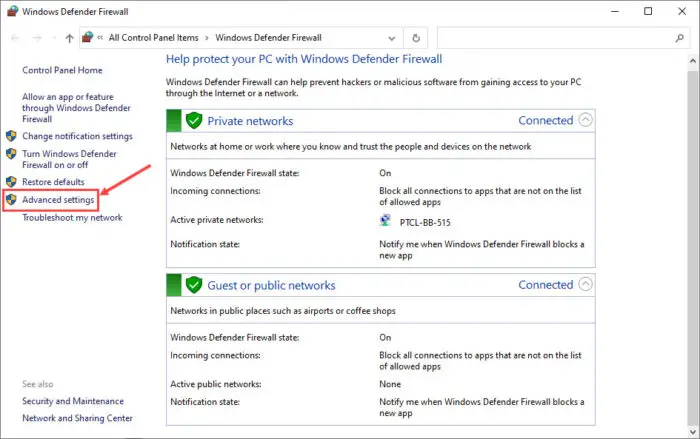
Now that you know your working network profile, you must now enable logging in for the dropped packets. To do so, open Windows Firewall in the Control Panel by typing in firewall.cpl in Run. From there, click on Advanced Settings on the left.
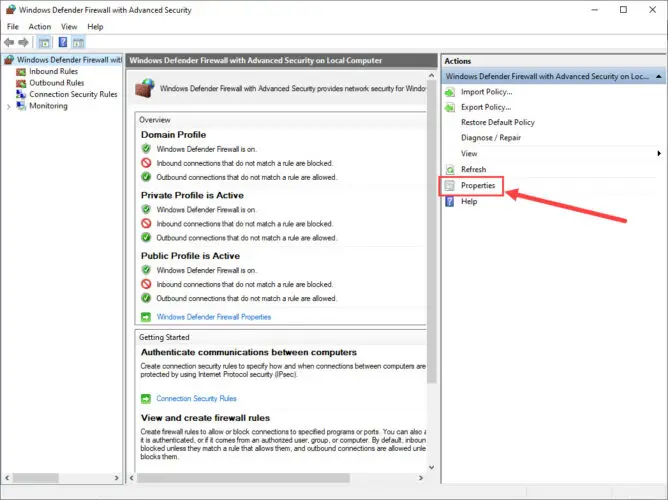
On the Windows Defender Firewall with Advanced Security page, click on Properties in the right pane.
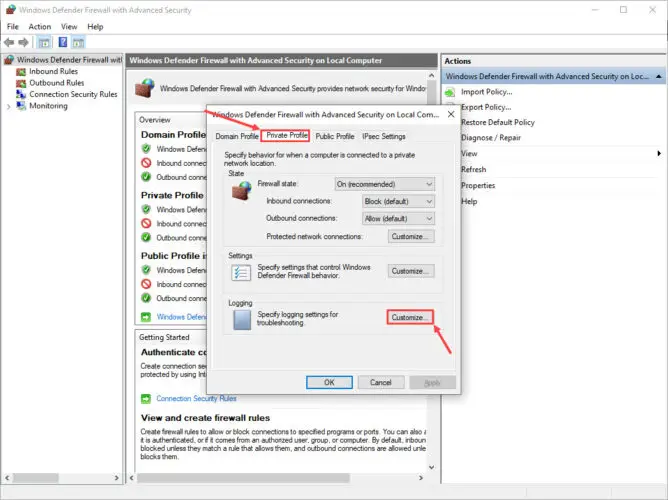
In the Properties pop-up, switch to the profile tab that you noticed earlier from the Settings app, and then click Customize under Logging.
In the Customize window, select Yes from the drop-down menu in front of “Log dropped packets” and then click OK.
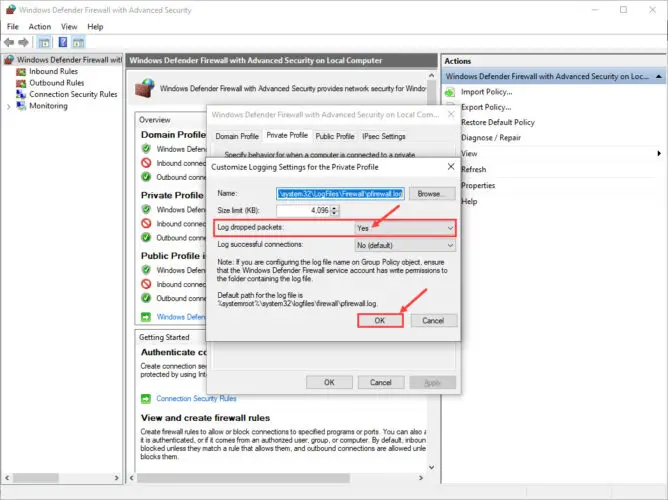
Close the Properties window as well by clicking OK. Now, navigate to the following location using File Explorer to check out the generated logs for the blocked ports.
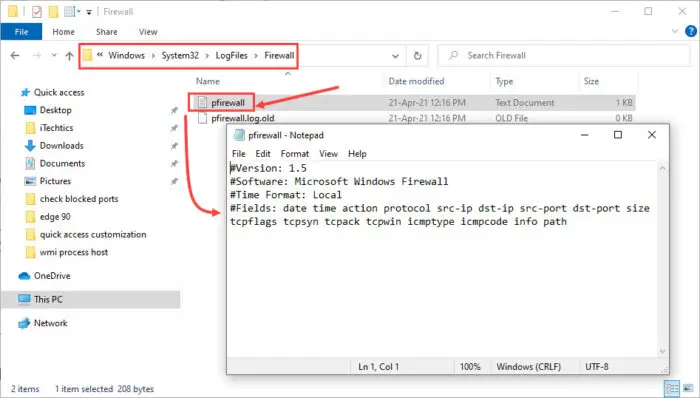
C Drive -> Windows -> System32 -> LogFiles -> Firewall
From there, open the text file named pfirewall.txt and then look for any ports blocked. If there is none, then the file will be empty.
Check for blocked ports using Command Prompt
Command Prompt can display the ports your machine is currently listening to. Any ports not displayed simply means that they are being blocked by the Firewall, or are not listening.
Run the Command Prompt with administrative privileges and then type in the following cmdlet:
netsh firewall show state
Although netsh firewall has been deprecated, it still works to give out the required information.
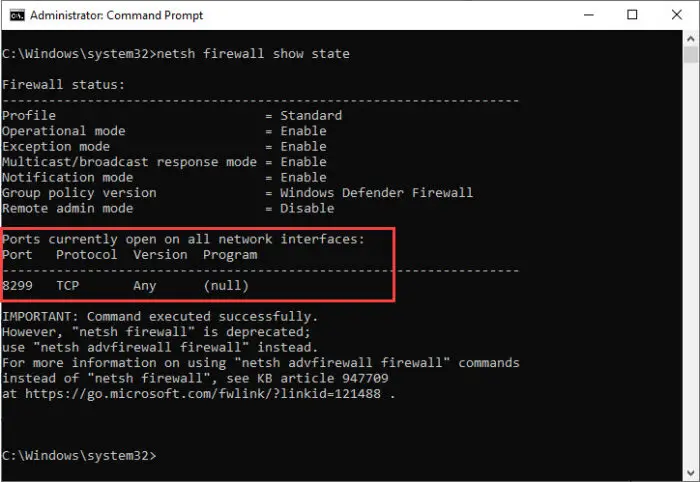
The open ports will be given in the highlighted area. From here you can determine whether the port you are looking for is open or not.
How to open a closed port
If you find that the port is being blocked by the Windows Firewall, you can allow it by using the steps given below.
- Open Windows Firewall by navigating to the following:
Control Panel -> System and Security -> Windows Defender Firewall -> Advanced Settings - Click on Inbound Rules in the left pane, and then click New rule in the right pane.

- On the Rule type screen in the New inbound rule wizard, select Port and then click Next.

- On the next screen, select the type of port and then enter the port number you want to open in front of Specific local ports. Click Next when done.

- On the next screen, select Allow the connection and then click Next.

- On the Profile screen, select All Profiles and click Next.

- Now set a name for the rule and click Finish.
You have now successfully unblocked the port you needed. You can repeat the steps to allow additional ports or delete this one by navigating to the Inbound rules and removing the respective rules.
Closing words
Having your Windows Firewall enabled all the time is important if you are connected directly to the internet. Firewall protects your system and your entire network from outside threats.
However, users that have a dedicated Firewall in place often tend to disable their Windows Firewall for free-flowing packets. This way they do not need to allow each port through the Firewall individually. However, this is only recommended for devices that are either not connected to the internet and are only accessible on the Local Area Network (LAN), or devices that are secured through dedicated Firewalls.


