Key Points
- To add a user account to the Administrator Group, open the Local Users and Computers console, go to “Users,” double-click the username, switch to the “Member of” tab, and add “Administrators.”
- You can also add a user to the Administrators group from the Computer Management Console, the Command Prompt, and Windows PowerShell.
The Windows operating system has two main account types: Standard and Administrative. The type of account defines the rights and privileges it has.
A standard user account has limited privileges to perform tasks. For example, they cannot change the properties of other user accounts, install computer-wide software, etc. However, an administrative account has complete control over the computer, as well as the other user accounts on it.
The first account created while performing a fresh Windows installation always has administrative privileges and is a member of the local Administrators group. It also has a built-in Administrator account.
You need an administrative account to perform tasks that otherwise would not be permitted. However, not everyone on your computer has to use the same Administrator account for this purpose. Instead, you can add the user account to the Administrators group which would automatically give them the required permissions.
In this article, we show you different methods to add a user account to the Administrators group.
Table of Contents
Why Add a User to Administrators Group?
The Administrators group contains the user accounts that have administrative privileges. This means that they would not require elevated permissions to perform certain tasks that make changes to the system.
A user account that is a member of this group would have the rights to install system-wide applications, make changes to the system settings (including Registries), and do much more.
If you have multiple user accounts on your computer, you may want to add one or more to the Administrators group so they can perform some tasks which a standard user cannot. Like installing or uninstalling software, making changes to the Windows Registry or the Group Policies, etc.
Of course, you must only add the user accounts you trust to the Administrators group, otherwise, an untrusted person could make changes to the computer and lock you out intentionally.
Let us now discuss the different methods to add a user account to the local Administrators group.
Note: To add a user to the Administrator’s group, you must be logged in from an administrative group as well. Otherwise, you will receive an “Access id denied” or “Insufficient privileges” error.
Add User to Administrators Group
Add User to Administrators Group from Local Users and Groups, Computer Management Console
Microsoft Management Consoles come preinstalled in Windows to control and manage the different OS components. 2 of these are the Local Users and Groups Console and the Computer Management Console. Both of these can be used to add a user to a group and have similar methods.
Before we proceed, let us inform you that these consoles have a folder named “Users” where all local users are listed, and another folder named “Groups” where the groups are listed. You can add a user account to a group from the Users folder as well as through the Groups folder.
Before we dive deep into the steps, let us see how to open either the Computer Management Console or the Local Users and Groups console.
-
To open the Local Users and Groups console, type in “lusrmgr.msc” in the Run Command box.

Open the Local Users and Groups console -
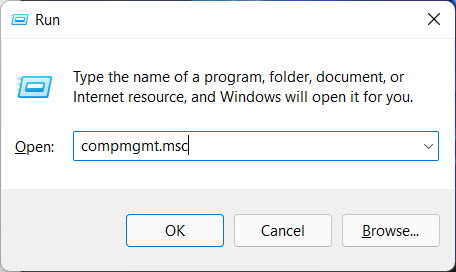
To open the Computer Management Console, type in “compmgmt.msc” in the Run Command box.

Open the Computer Management Console
Once accessed, you can use either of the following methods to add a user to the Administrators group.
Add User to Administrators Group from Users Folder
-
Open the “Users” folder from the left pane.

Open the Users folder in console -
Double-click the user account that you want to add to the Administrators group.

Open the User account properties -
Switch to the “Member of” tab.
-
Click Add.

Add user to a group -
Type in “Administrators” in the text field below “Enter the object names to select.”

Enter Administrators group name -
Click “Check Names.”
This will convert the group name to the Group’s Fully Qualified Domain Name (FQDN).

Check the full group name -
Click Ok.
-
Back on the user Properties window, click Apply and Ok.
Add User to Administrators Group from Groups Folder
-
Open the “Groups” folder from the left pane.

Open the Groups folder in the console -
Double-click the “Administrators” group.

Open the Administrators group properties -
Click Add.

Add a user to the Administrators group -
Type in the name of the user account you want to add to the Administrators group in the text field below “Enter the object names to select.”

Enter the name of the user account to add to the Administrators group -
Click “Check Names.”
This will convert the user account name to its Fully Qualified Domain Name (FQDN).

Check full username -
Click Ok.
-
Back on the user Properties window, click Apply and Ok.
Using either of the methods above, you will have successfully added a user account to the Administrators group.
If needed, you can just as easily remove them from the Administrators group’s properties, or the user account’s properties, by clicking Remove at the bottom of the window.

Add User to Administrators Group from Command Prompt
If you are a fan of the command line, then you can use the Command Prompt (or Windows PowerShell) to add a user account to the Administrator’s group. Here is how:
-
Press the Windows key + R shortcut keys to open the Run Command box.
-
Type in “cmd” and press CTRL + Shift + Enter to run Command Prompt with elevated privileges.
-
Run the following command while substituting [Username] with the name of the user account to add to the local Administrators account:
Net localgroup "Administrators" "[Username]" /add
Add user to Administrators group from Command Prompt
The user will now be a part of the Administrators group.
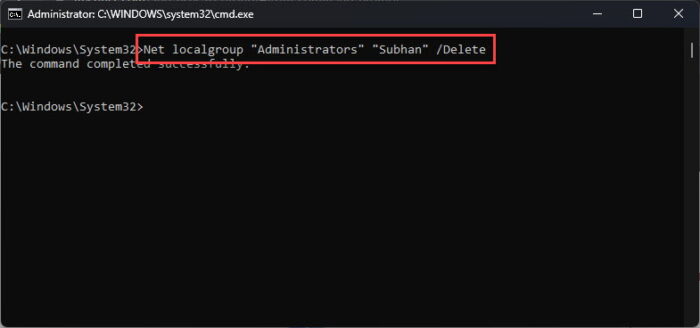
In case you want to remove a username from the Administrator’s account, use this command:
Net localgroup "Administrators" "[Username]" /Delete
Add User to Administrators Group from PowerShell
To add a user to the Administrators group for Windows PowerShell, use these steps:
-
Press the Windows key + R shortcut keys to open the Run Command box.
-
Type in “powershell” and press CTRL + Shift + Enter to run Command Prompt with elevated privileges.
-
Run the following command while substituting [Username] with the name of the user account to add to the local Administrators account:
Add-LocalGroupMember -Group "Administrators" -Member "[Username]"
Add user to Administrators group from PowerShell
The user will now be a part of the Administrators group.
In case you want to remove a username from the Administrator’s account, use this command in PowerShell:
Remove-LocalGroupMember -Group "Administrators" -Member "[Username]"
Ending Thoughts
This article lists all the methods to add a user account to the local Administrators group. However, we do not recommend that you add every user on your computer to the Administrators group. This would give anyone the power to make changes to the computer without the actual Admin’s consent.
Only those user accounts should be part of the Administrators group which need the privileges to perform certain tasks and are trusted by the computer’s owner.


